Part 2: Why a 1–10 Resistance Scale Doesn’t Work for Coaching Resistance
In part 1 of this series on coaching resistance in cycling classes, I described a popular but ineffective coaching method: assigning a specific number of “turns” on the resistance knob.
Now I want to address another flawed method: using a 1–10 resistance scale. Honestly, this one might be even worse—because it’s not tied to anything meaningful. It’s arbitrary, inconsistent, and ultimately unhelpful.
The idea behind the scale (I’m assuming) is that resistance levels 1 through 5 represent a “flat road” and are easier, while 6 through 10 represent a “climb” and are harder. Unfortunately, that concept is fundamentally flawed.
Let me break down four reasons why this method leads to confusion:
A “flat road” has resistance. Always.
I discovered years ago that not all instructors understood this concept.
In the early 2000s, I was teaching a Spinning® certification at the WSSC conference in Miami. During a cadence drill, I coached the group to pedal at a moderate seated flat between 80 and 90 rpm. Since we didn’t yet have cadence meters at that time, I asked them to match my leg speed.
One young woman in the front row was pedaling wildly—around 120 rpm—and bouncing all over the saddle. I got off my bike and stood next to her, gently asking her to add more resistance. I said “more…more…” at least ten times until she added enough to slow her cadence to around 90 rpm, and the bouncing stopped. “There! That’s it,” I said.
She looked at me with surprise and said, “Oh! You mean a hill!”
I was speechless. No, I didn’t mean a hill!
That moment stuck with me. She didn’t realize a flat road needs resistance. She had been taught that unless it feels hard, it must be a flat road—and that any resistance means it’s a hill. Her instructors had done her a great disservice.
Unfortunately, that misconception still persists today.
Here’s the truth: a flat road has resistance. Otherwise, your legs spin out of control.
Resistance is infinite—not a 1–10 scale.
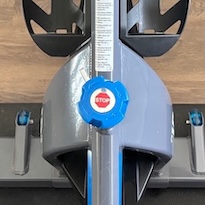
On most indoor bikes, resistance can be adjusted in micro-increments from zero (knob turned all the way left) to maximum (all the way right). That’s an infinite scale, not a 10-point one.
This becomes clearer when we introduce power output (watts), which is the product of force and velocity. In our indoor cycling world, we simplify that to resistance and cadence. Our intensity comes from how much resistance we’re pushing and how fast we’re turning the pedals.
Let’s say we want riders to hold a steady output of 150 watts. That can be achieved in many ways:
- 150 watts at 60 rpm requires a lot of resistance.
- 150 watts at 100 rpm requires much less resistance.
You could even reach 150 watts at 50, 70, 80, 90, 110, or even 120 rpm. The output stays the same—but the feel is completely different.
Trying to reduce infinite combinations of cadence and resistance into 10 vague levels just doesn’t work.
Terrain is not intensity.
The 1–10 scale often confuses terrain (flat vs. climb) with intensity. But those are not the same thing.
You can be on a “climb” (lower cadence) and working at a moderate intensity. You can be on a “flat” (higher cadence) and pushing at very high intensity.
Outdoors, hills usually are harder—because you’re working against gravity. You have fewer gearing options and your weight matters. On flat roads, you can make it easier or harder depending on your gearing and how much effort you put in.
Indoors, we don’t have gravity to contend with—but we do have full control over resistance and cadence. Just because you add resistance doesn’t make it a “hill.” Just because it’s at a faster cadence doesn’t mean it’s “easy.”
Here’s a scenario: a rider is pedaling at 75 rpm and dials in what they believe is a “7” on the 1–10 resistance scale their instructor asks them to find. Then they slow their cadence but don’t touch the dial. Now what? Is it still a “7”? The resistance hasn’t changed, but the effort feels different. Is it still a “hill”?
See how confusing this gets?

Terrain is a visual metaphor—a storytelling tool to help riders engage with effort. But it’s not a measure of intensity by itself.
Too many numbers = too much confusion.
Let’s take a step back. Riders are already juggling a lot of numbers: cadence, watts (if you have power meters), heart rate (if you use heart rate monitors), and the 1–10 rate of perceived exertion (RPE) scale (which I hope you’re using).
Adding another 1–10 scale just for resistance? That’s overload.
Imagine cueing your class like this:
“We’re riding a 5 out of 10 for resistance…but aim for an RPE of 8.”
Wait, what?
Your riders are left trying to reconcile two different scales that don’t align. Is it a 5 for resistance? A 5 for terrain? An 8 for intensity? Where does cadence fit in? How do they know what to feel?
These two scales don’t map directly. So don’t confuse your riders by using both. And if you don’t have power meters and you don’t use the RPE scale—and you’re only using a resistance scale—how are you defining intensity at all?
It’s hard enough for newer riders to learn how to match resistance with cadence. Don’t give them a math problem in the middle of their workout.
Wrapping Up
Here’s the bottom line: resistance alone doesn’t define a hill. Cadence alone doesn’t define a flat. Intensity comes from the combination of both.
What we describe in class—“hill,” “fast flat,” “rolling terrain,” “racing,” etc.—are mental images designed to evoke a certain output. But the real metric is the effort created by the interplay between resistance and cadence.
If your goal is to help riders better understand resistance and intensity, it’s time to ditch the 1–10 resistance scale.
In part 3, I’ll share specific coaching cues to help establish a solid starting resistance. In part 4, we’ll go deeper into a more effective way to coach resistance—one that links cadence and resistance to help you guide effort more clearly and consistently. You’ll get resistance cues and song suggestions for a variety of class scenarios, from warm-ups to climbs to VO2 max intervals. Then in part 5, we’ll bring it all together with a series of drills designed to reinforce these concepts and deepen rider awareness.
Because ultimately, that’s the goal of this entire series—and of every class you teach: to help your riders become more aware. Aware of what their bodies are doing, how they’re responding, and how to adjust in real time to stay on target.


Your last sentence really hits the nail on the head. In all my years of instructing it seems few other instructors “get it”. Having bikes with cadence and power meters has been revolutionary. I also use breathing touch points- calm, focused, challenged and gasping are roughly four zones. especially 15 min. in, although that changes later as cumulative efforts add up.
Okay, but you’re not saying rate of perceived exertion scale (RPE) is useless and arbitrary? Power and watts is best, IMHO, but for newbies RPE makes sense whether flat or hill, high or low cadence.
no, I’m not saying RPE is useless and arbitrary.
Especially if you use an RPE scale, using a scale for resistance is massively confusing because they won’t align. Too many numbers.
I’ve always been a huge proponent of perceived exertion. I prefer using descriptive words over using a scale, but sometimes that scale is helpful, especially for instructors (like when creating a profile and you need a quick way to identify the intensity you want for a given segment).
Also, PE is a great way to help riders understand their power zones better.