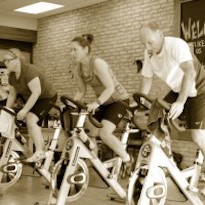
Indoor cycling participants love standing in class. Let’s help them do it effectively.
Here’s a great drill to add to your profiles that teaches standing and sitting with control and efficiency. Once mastered, the technique will improve every other drill that requires standing.
For outdoor riders, smooth transitions in and out of the saddle are essential. Sudden, jerky movements can push your bike into another rider’s wheel if you’re riding in a group, causing a crash. (Believe me, cyclists quickly note and avoid dangerous riders in a group!) Beyond erratic riding, controlled transitions help maintain consistent intensity, improving endurance and overall performance.
Indoors, we may not risk crashing (thankfully!), but smooth transitions still matter for managing intensity and helping riders, especially beginners, sustain an entire class. As riders learn to stand more smoothly, they’ll avoid the big power spikes that often occur when standing. Instead, they’ll be able to transition with only minor, controlled increases in effort (5–8 watts), maintaining consistency without large swings in power output. Sure, there may be times when you want a big surge in power—like when you’re simulating an attack on a hill or pushing for a burst of intensity—but that’s a deliberate choice in your class design. The key is being able to do both: pedal and stand smoothly without losing energy when the goal is consistent output, and also having the option to push harder with greater resistance or cadence when you want to increase power intentionally.
The Drill


That picture explains why position one, two and three once meant something (though how pos 3 is more “real” I don’t get – it’s a short distance from the bar to the brake hoods where I go when out of the saddle on the road), but position three can be a real stretch on some of the power metered indoor bikes we use in our studios now. I’d rather never lure someone over their bars by calling for a position – instead I will cue hips over bottom bracket. I do look at wrists and elbow bend as well.
I was inspired by this format to try the “HIIT it hard…then cruise” ride yesterday (link above). My class loved it, but it was super hard! Thanks for putting it together, Jennifer!
Always helpful! Thanks
exactly the information i was looking for
thank you
awesome, so glad it’s helpful.
This is great information! I’m going to practice this myself and then I’ll be able to share with the class I teach. Thank you!