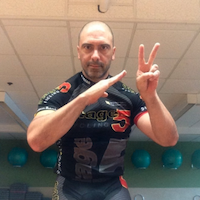
Recently, Christine Nielsen taught you about the three different learning styles that are prevalent for learning athletic skills. These are known as VAK—visual, auditory, and kinesthetic. We followed that up with an article about how best to reach your kinesthetic learners, probably the most challenging of the learning styles. This article will focus on how to meet the needs of your visual learners using hand signals so that they will profit from your coaching and not miss out on any of your message.
Visual learners are probably the most common amongst our students, yet so many instructors miss out on adding the signals that help them to grasp directives. I’ve been to or observed many classes in which the instructor simply verbally describes what she wants, or yells out commands, and except for a few nondescript hand-waving episodes (more for drama than for clarification), they do not use hand signals in ways that actually help their students understand what it is they want them to do.
Visual learners may not be paying as close attention to your verbal coaching as other students. This is not because they are disrespectful or inattentive, but rather because they are wired to look for visual aids to help them assimilate information. If they don’t see one, the words may not click in their head. On the other hand, your visual hand signals may be lost on those students who don’t rely on visual aids as much, but that doesn’t matter; for those who need it, it is extremely helpful. For this reason, it’s beneficial to try to incorporate simple hand signals for many of your verbal cues.
We’ve all been in or heard of classes in which the music is so loud and/or the acoustics are so poor, or the instructor has not learned to speak properly into a microphone, so riders have trouble hearing anyway. In all of these situations, all students will benefit from these visual cues, even the individuals who are not necessarily visual learners.
For all these reasons, don’t be mistaken into thinking that it is overkill to add hand signals to your cueing, even ones that on the surface may seem overly obvious.
When you become consistent in using the same visuals to mean the same thing, it won’t be long before you can begin to talk less for your regulars. This can enhance a profile that focuses on the mind-body connection. It also is very helpful if you teach to big groups or if your studio is large with poor acoustics, such as in a gymnasium.
Of course, if you’ve regularly got new students coming in to your classes, you want to make sure to use both verbal commands that explain in detail what it is you are seeking, plus your visual cues.
Christine, Tom, and I have assembled numerous hand signals that we use frequently. Hopefully this three-part series will give you ideas to create your own. Part 1 focuses on visuals for technique and pedal stroke. Part 2 includes visuals for intensity, terrain, and duration, and Part 3 tops it off with visuals for stretching and a few other miscellaneous situations.


Love the visual cues. Some I alaready use. Now I have more to add! Also would love a video on pedal stroke. Yes, I’m a visual learner 😉
Thanks Jennifer.
Thanks Robert. Youre thinking just like me! 😉 Pedal stroke drills will be a future video training or webinar for ICA members.
Just back and checking the entries. I love the visual cues only could we see a video of the pedal stroke drill. I guess I need to see how you do the demonstration Jennifer. Super stuff!
Once again, you are acutely aware of something I am personally working on in my classes…thank you! The wrist position especially is gold; I have noticed an increasing number of my riders “shaking out” their wrists mid-class like they had carpal tunnel. I’ll be using that tip immediately. Can’t wait for parts 2 and 3!
You will see between earlier and more recent photos, that both Tom and I have had a visit with the scissors (or in Tom’s case, the razor!) In Part 2, I have an earlier photo of Tom with hair!
😉
I love these – already use some, but the shoulder visual looks great.